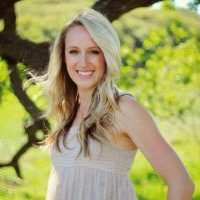
So... people have been asking when I am going to post pictures of my own wedding - so here they are!
[photos by: JDexterPhotography]
[flowers by: Details of the Day]
[catering & venue: The Rincon Beach Club]
And although I planned my own wedding, I, too, needed help the day of. So, Melissa Sylvester, wedding and event coordinator from the Rincon Beach Club, took control and did an INCREDIBLE job! [P.S. - they cater outside events too! Definitely a must for the Santa Barbara area].
Fun details:
- Instead of a full dinner, we did an hors d'oeuvres and dessert reception, including baked brie with pesto and assorted fruit, fresh baked cookies with shot glasses of milk, chocolate fondue, lime brulée on individual spoons, and a full candy bar.
- Our candy bar featured candies that were favorites of the bride, groom, mother of the bride, father of the bride, mother of the groom, and father of the groom. Guests were able to fill up cellophane bags with their candy mix and sealed them with stickers that said "Brett and Nicole."
- A lounge area around a fire pit was complemented by a s'mores bar and a s'mores attendent, who assisted guests with roasting marshmallows and creating the perfect s'more.
- Our amazing florist Gretchen from Details of the Day used limes and coffee beans in our centerpieces to tie in the green and brown color scheme. She also hung votive candles from the altar to create a candlelit atmosphere.
Wednesday, February 24, 2010
Monday, February 22, 2010
cone original
It's probably the easiest wedding craft you can make, and one of the most versatile. What is it? A paper cone.
Martha Stewart provides an easy template to make these cones for a variety of uses.
1. Print out this template on heavy cardstock
2. Cut out cone template and trace onto scrapbook paper in your wedding colors
3. Cut out cones, roll, and fasten with glue (hold with a paper clip on each end until glue dries) or fasten with a sticker label
4. Fill with whatever your heart desires!
This paper cone is used to shower the bride and groom with flower petals after they say "I do." [have labels made at My Wedding Labels] For an eco-friendly option, fill with birdseed, flower seeds, or Ecofetti.
Place two cones in a short glass vase and have the florist place small flower arrangements inside. Often times, a florist will have extra blossoms from creating your bouquet and centerpieces, and would be more than happy to place them wherever you like. Use this idea as a low centerpiece, or to decorate the guest book table, the gift table, or the buffet line.
"Pommes Frites" is just a classy way of saying french fries. Have these mini hors d'œuvres served during cocktail hour with your personalized paper cones for a casual-chic snack.
Fill with Jordan almonds, personalized M&M's, or lemon drops for a great favor idea.
Have fun with this easy DIY craft! Call up your bridesmaids, and start the assembly line. There's lots you can do with this easy cone - so get creative!
Friday, February 19, 2010
mason jar
Wednesday, February 17, 2010
the giving tree.
Tuesday, February 16, 2010
Citrus Sweet
Vibrant yellow, cream, black, and small splashes of green make this a beautiful color scheme option for a spring or summer wedding. It was gorgeous outside today (78˚ in the middle of February... don't be jealous!) and I might have jumped ahead a few seasons. So sue me.
Toss in some small lemons and limes in tall glass vases for an inexpensive centerpiece! Slice up a few, too, and place them in the glass vases below flower arrangements. Also, baskets of lemons with some of their original leaves tucked inside make nice accents.
To go along with the theme, serve lemonade and limeade (spiked, perhaps?) in glass infusion jars during cocktail hour.
Monday, February 15, 2010
...let.there.be.light...
Lighting at a wedding can get expensive. REAL expensive. How do you create mood lighting without shelling out so much cash? Here are some do it yourself lighting options that can make an evening wedding glow.
[note: if your wedding venue has a "no open flame" restriction, use battery-operated flameless candles. These luminarias will hide any sight of a fake candle, and will give the same effect as a votive - without the fire danger!]
These paper luminaries hang from white twinkle lights, and are fashioned out of paper bags. Martha Stewart gives a "how to:"
Tools and Materials
Strings of full-size Christmas lights with clear bulbs (remove every other bulb)
Light-colored paper bags about 7 inches wide (for each lantern, you'll need two the same size)
A utility knife
A ruler
2-inch round self-stick labels
2-inch-wide single-face satin ribbon (one 48-inch length for each lantern)
Paper Lanterns How-To1. Trim the tops of each bag to make straight edges. For the top of each lantern, stick a label on the inside bottom center of one bag to reinforce. Reaching inside the bag with a utility knife, cut two 1 1/2-inch slits, making an X on the label.
2. To attach bags to lights, first remove a bulb, and slide the socket through the X, and then screw the bulb back in.
3. For the lantern bottom, slide a second bag up over the first one.
4. Lay the center of the ribbon on top of the wire at the socket; wrap ribbon snugly down sides of bags. Knot at bottom and let ends hang.
♥ ♥ ♥ ♥ ♥ ♥
Next, for a more personalized touch, use photos of the bride or groom (either their engagement photos, or of their childhood) to create a photo display as well as soft lighting along tables. This idea also works well for bridal showers!
Each luminary is made from three photo frames with the backs removed.
Print photos (black & white works best) onto ecru-colored vellum and fasten to back of frame with tape or glue around edges.
Glue photo frames together to make a triangular form. Place a votive candle in the middle, light, and enjoy.
[credit: Martha Stewart]
♥ ♥ ♥ ♥ ♥ ♥
For a nice table centerpiece, or even to line a walkway, use different sizes of paper bags to create soft light.
Tools and Materials
Light-colored paper lunch bags in various sizes
Ruler
Scalloped rotary cutter
12-inch gold-colored doilies (white ones won't show through as well)
Utility knife
Scissors
Glue stick or Xyron sticker-making machine
Votive candles in glass holders
Utility lighter
Light-colored paper lunch bags in various sizes
Ruler
Scalloped rotary cutter
12-inch gold-colored doilies (white ones won't show through as well)
Utility knife
Scissors
Glue stick or Xyron sticker-making machine
Votive candles in glass holders
Utility lighter
Luminarias How-To
1. Lay each bag flat; use a ruler to guide the scalloped rotary cutter as you cut a new top edge 1 inch below the bag's original edge.
2. To cut doilies to fit the bag, lay a bag flat on the work surface. Lay a doily on the bag, and determine where to cut in order to create a pleasing design. Cut straight lines with a ruler and a utility knife; use scissors to snip along curves. The final size of the doily should be 1/8 inch narrower than the width of the bag so the doily will lay flat inside.
3. Coat the gold side of the doily generously with glue from the glue stick, or coat it with self-adhesive using the Xyron machine. Attach doily to the inside of the front of the bag, positioning it as desired. After gluing, close the bag, and run your hand firmly over the design to seal. Open the bag, and let dry at least 1 hour.
4. Set the bag in desired location, and then put the votive candle, in its holder, inside. Light the wick once the candle holder has been securely placed; do not carry the lit luminaria.
[credit: Martha Stewart]
Labels:
candles,
centerpieces,
lighting,
luminarias,
paper bags,
photos
Use an accent, but don't abuse it!
Sometimes, when we have a "theme" or an "accent" we want to add to a wedding, it becomes very easy to let it go overboard. The point is subtlety - make sure the theme doesn't take over your whole wedding. The following inspiration board is a good example of letting an accent do just that: accentuate your decor - not overload it. Using the damask print sparingly is a nice touch, but too much can make even your sober guests dizzy.
Saturday, February 13, 2010
Paramount Ranch Wedding - "Go West"
Inspiration board from a wedding I coordinated at Paramount Ranch in Agoura Hills, CA (where they filmed Dr. Quinn: Medicine Woman and M*A*S*H). Working with a national park always has its special rules, but this wedding turned out beautifully.
Flowers: Details of the Day
Photography: Laurel Dailey
Special details:
Do It Yourself Tip:
We found simple wood cut-out shapes at a craft store (sheriff star [shown]; horseshoe; barn; apple; fence). Then:
1. Paint them deep red (or any color matching the scheme); let dry.
2. Hot glue twine to the back, enough to tie around the apothecary jar
3. Write jar's contents on the painted shape with metallic permanent marker
4. Fill jar with desired contents; insert small metal candy scoop; provide little paper bags for guests to fill as their wedding favor!
Flowers: Details of the Day
Photography: Laurel Dailey
Special details:
- The bride and groom hired a square dance caller to teach and call out traditional square dances - the hit of the evening!
- Cocktail hour took place in the middle of the western town used for many Hollywood motion pictures; drinks were served from the "Saloon"
- The bride and groom are the outdoors-y type, and decided to make a "Trail Mix bar" - apothecary jars were filled with granola, banana chips, dried cranberries, almonds, and yogurt chips, and guests filled up small tin-tie paper bags with their own special trail mix combination.
Here's a picture from the trail mix bar:
Do It Yourself Tip:
We found simple wood cut-out shapes at a craft store (sheriff star [shown]; horseshoe; barn; apple; fence). Then:
1. Paint them deep red (or any color matching the scheme); let dry.
2. Hot glue twine to the back, enough to tie around the apothecary jar
3. Write jar's contents on the painted shape with metallic permanent marker
4. Fill jar with desired contents; insert small metal candy scoop; provide little paper bags for guests to fill as their wedding favor!
Labels:
baseball,
country,
day-of coordinating,
outdoor,
Paramount Ranch,
rustic,
saloon,
square dancing,
trail mix bar
Welcome!
I'm no "blogger" by any means. Well, at least I didn't think so, until now... as I'm writing my first blog. What's my purpose? Let me make it simple:
I love weddings.
I am already married, had the most perfect wedding I could have ever hoped for, and I still love weddings. I have been a consult for weddings, been a "day-of" coordinator, ran rehearsals, assisted with planning, and been a bride. I've been there.
Here, I will be posting inspiration, DIY projects, things I love, new ideas, and everything wedding. So, enjoy, leave comments, tell me what you like and what you don't. And, if you're a southern California bride, I'd love to help you plan your special day - in person!
Subscribe to:
Posts (Atom)